

1. Register a Microsoft Entra app
In the Azure portal, search for App registrations: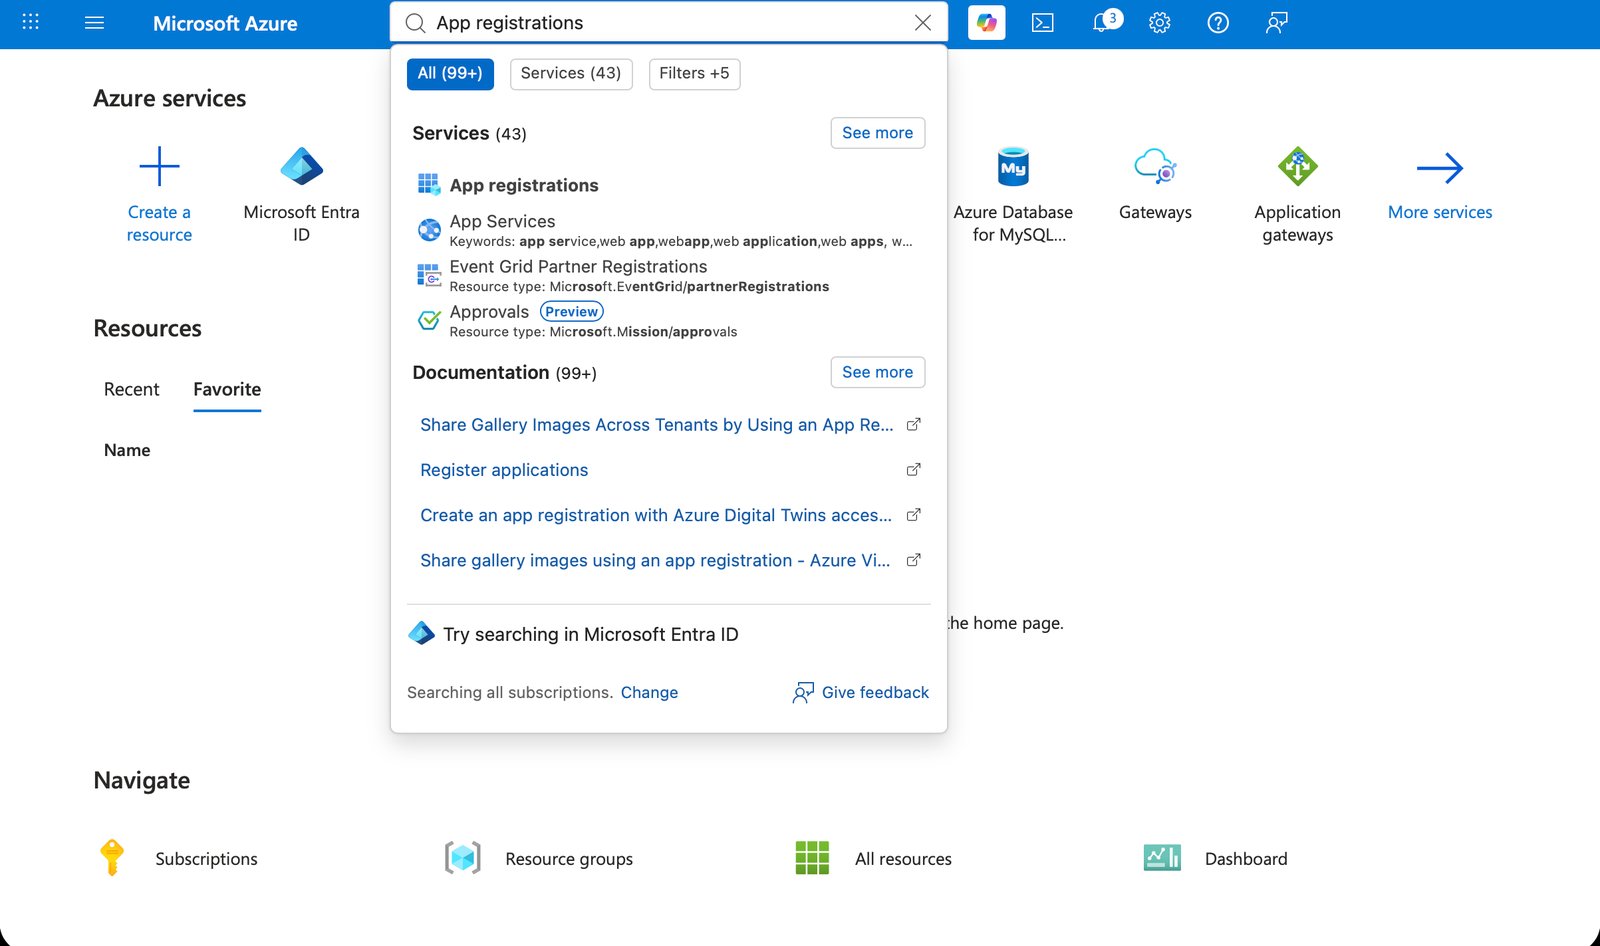
The portal search finds App registrations under Services.
- Name: anything you like (users never see it; the Teams app name comes from the manifest).
- Supported account types: Single tenant only is the right choice for a bot that serves your own organization.
- Redirect URI: leave empty.
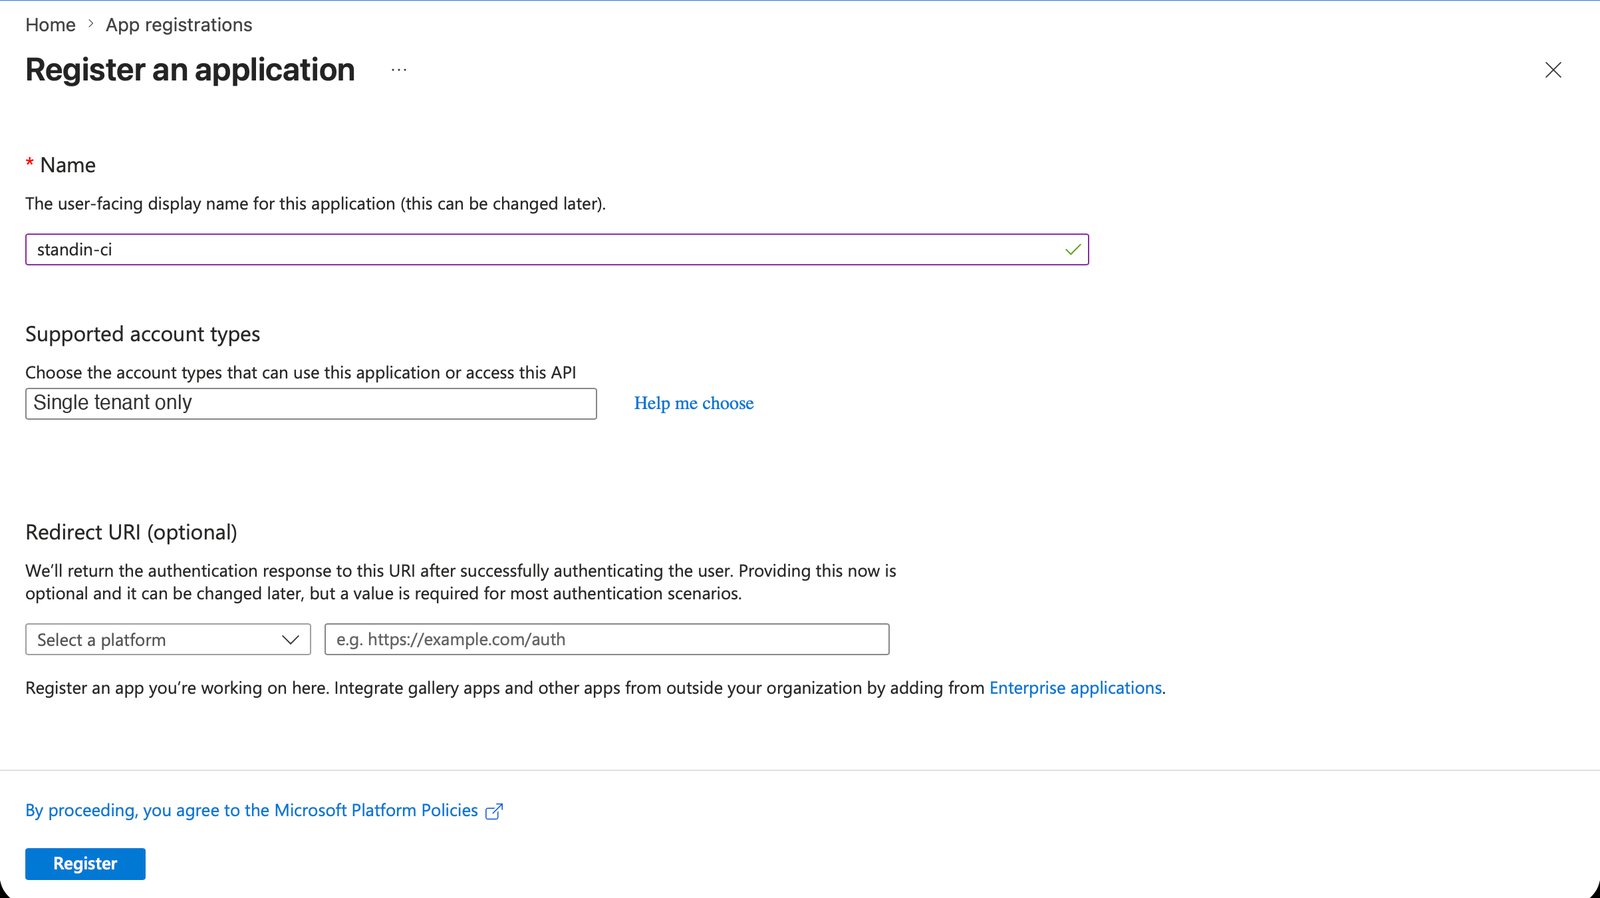
App registrations > New registration: name it and keep Single tenant only.
2. Record the IDs
On the app’s Overview page, copy two values - you will need them repeatedly:- Application (client) ID - this is your
botId(and theMicrosoftAppIdof the Azure Bot). - Directory (tenant) ID - your tenant.
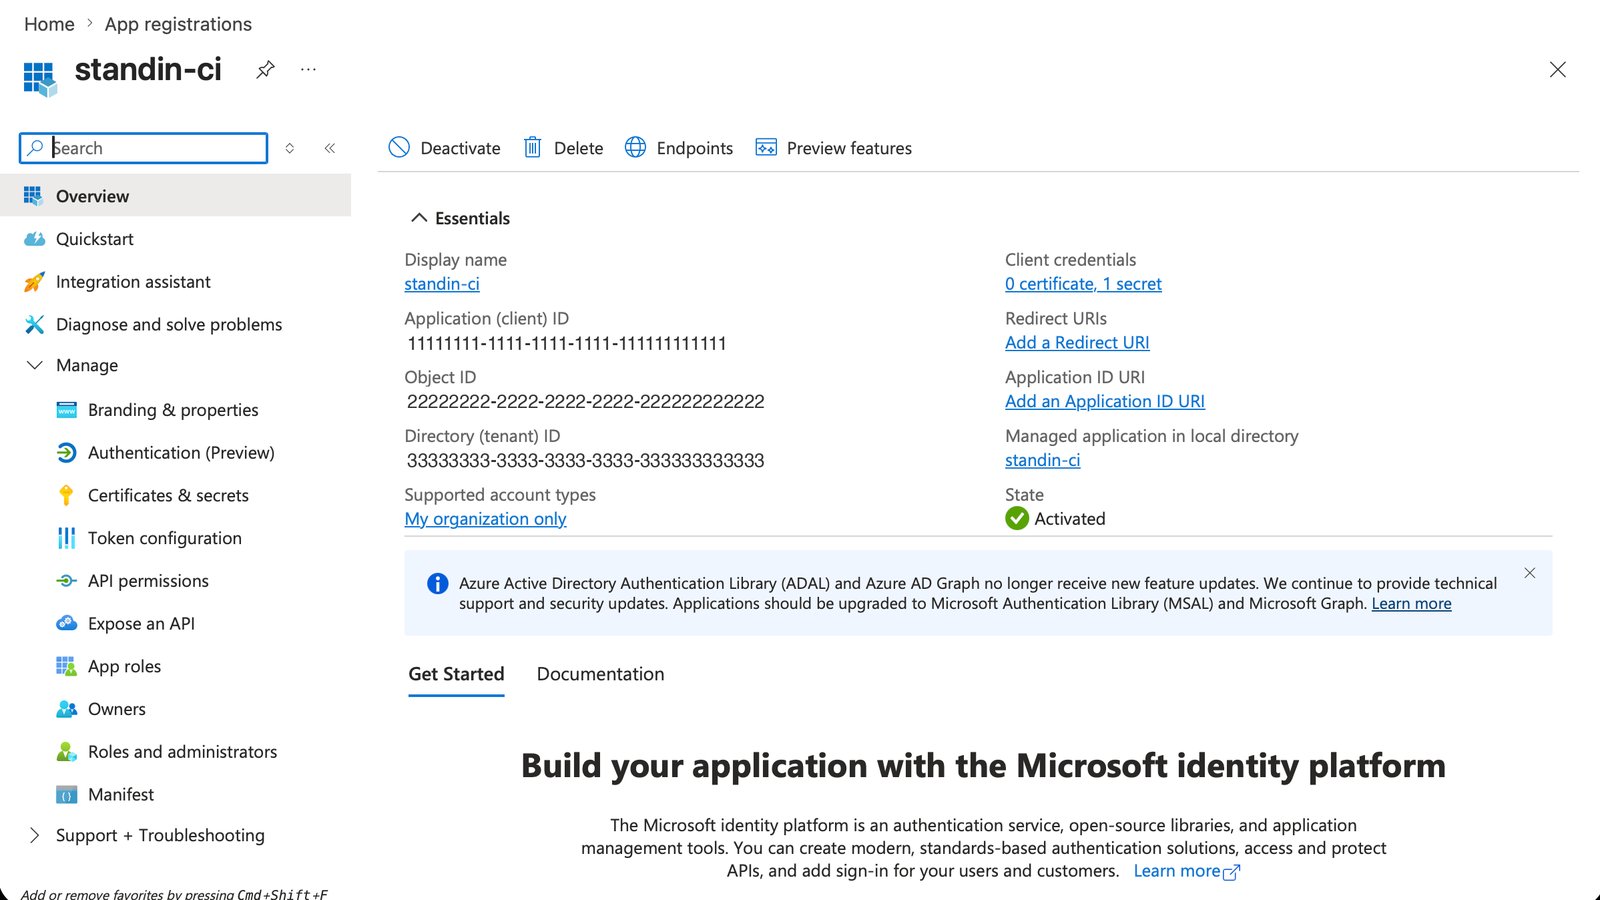
The Overview page shows the Application (client) ID and Directory (tenant) ID.
3. Create a client secret
Under Certificates & secrets, select New client secret and copy the secret Value immediately - it is shown only once. StandIn uses this credential (App ID + secret + tenant) to authenticate as your bot; you provide it during pairing or in the dashboard when registering the identity.4. Create the Azure Bot resource
Search the portal for Bot and open Bot Services:
The portal search: Bot Services is where Azure Bot resources live.
- Bot handle / subscription / resource group: your choice.
- Data residency: Global is typical.
- Pricing tier: the free F0 tier is fine (Standard channels like Teams are free).
- Type of App: Single Tenant, matching the app registration.
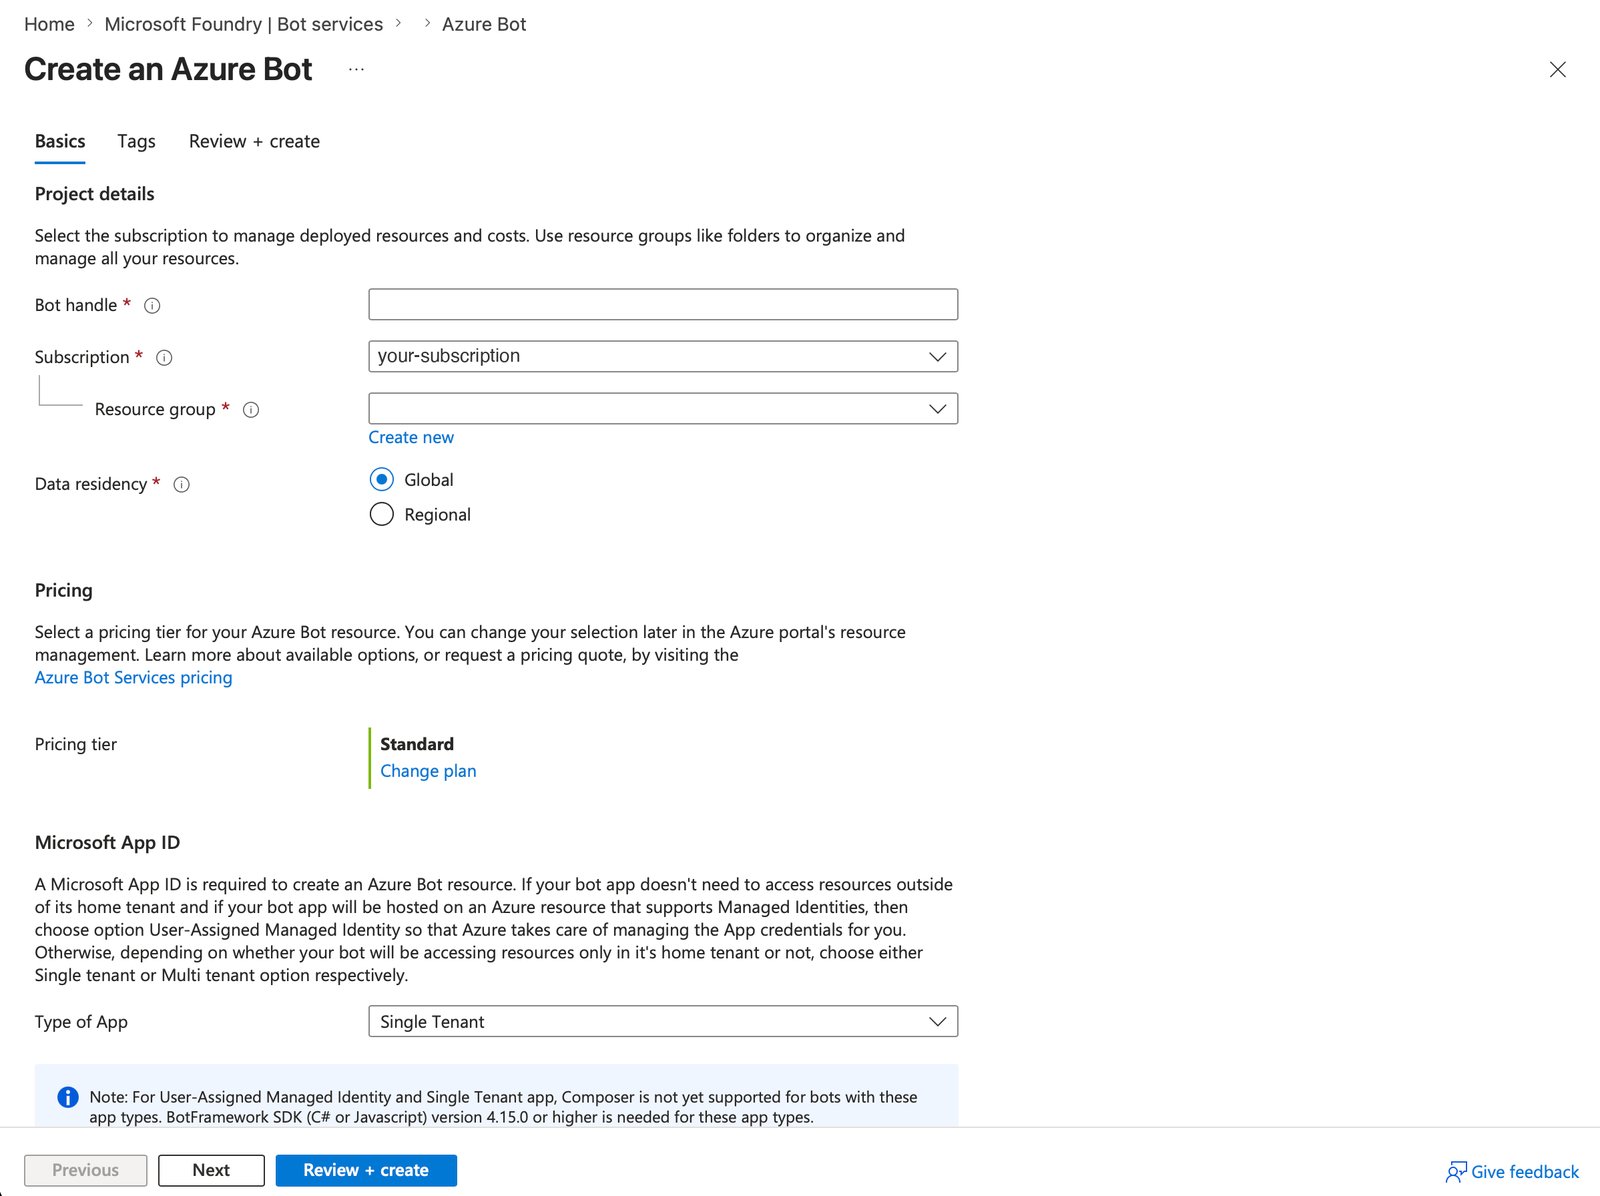
Create an Azure Bot: pick a handle, subscription, and pricing tier.
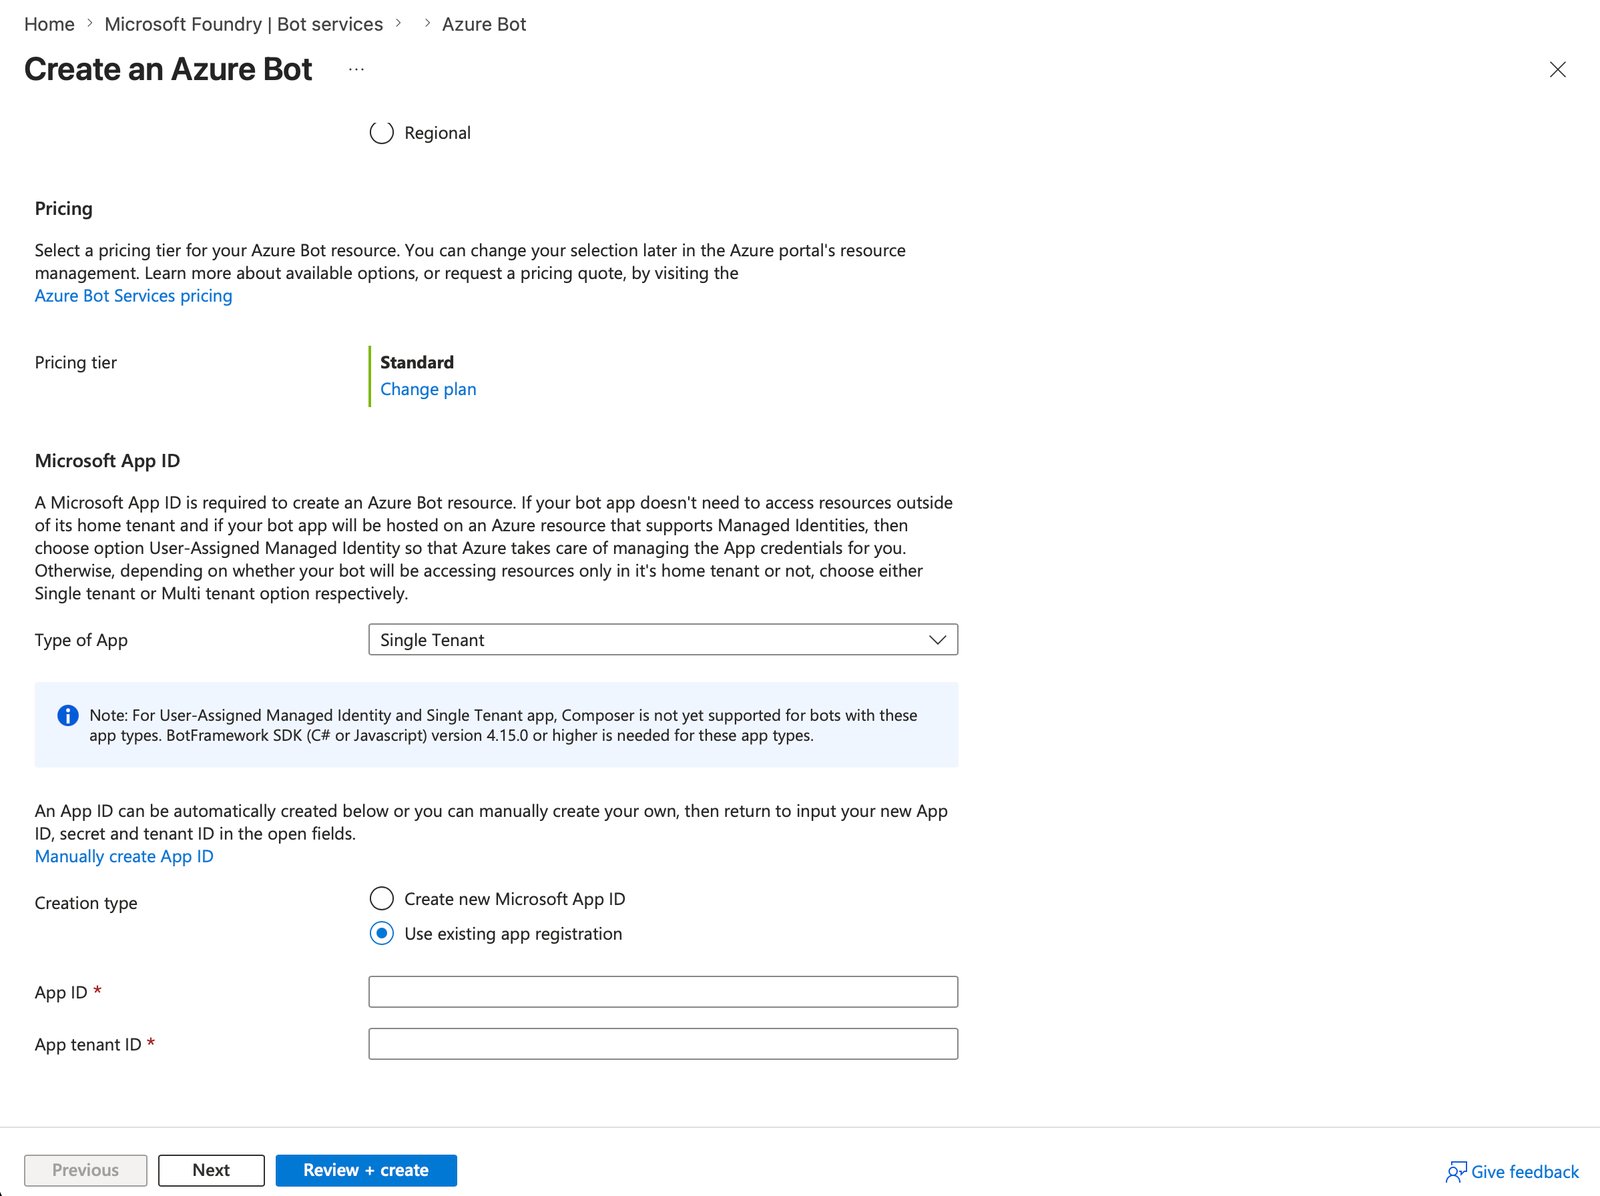
Creation type: Use existing app registration, with the client ID and tenant ID from step 2.
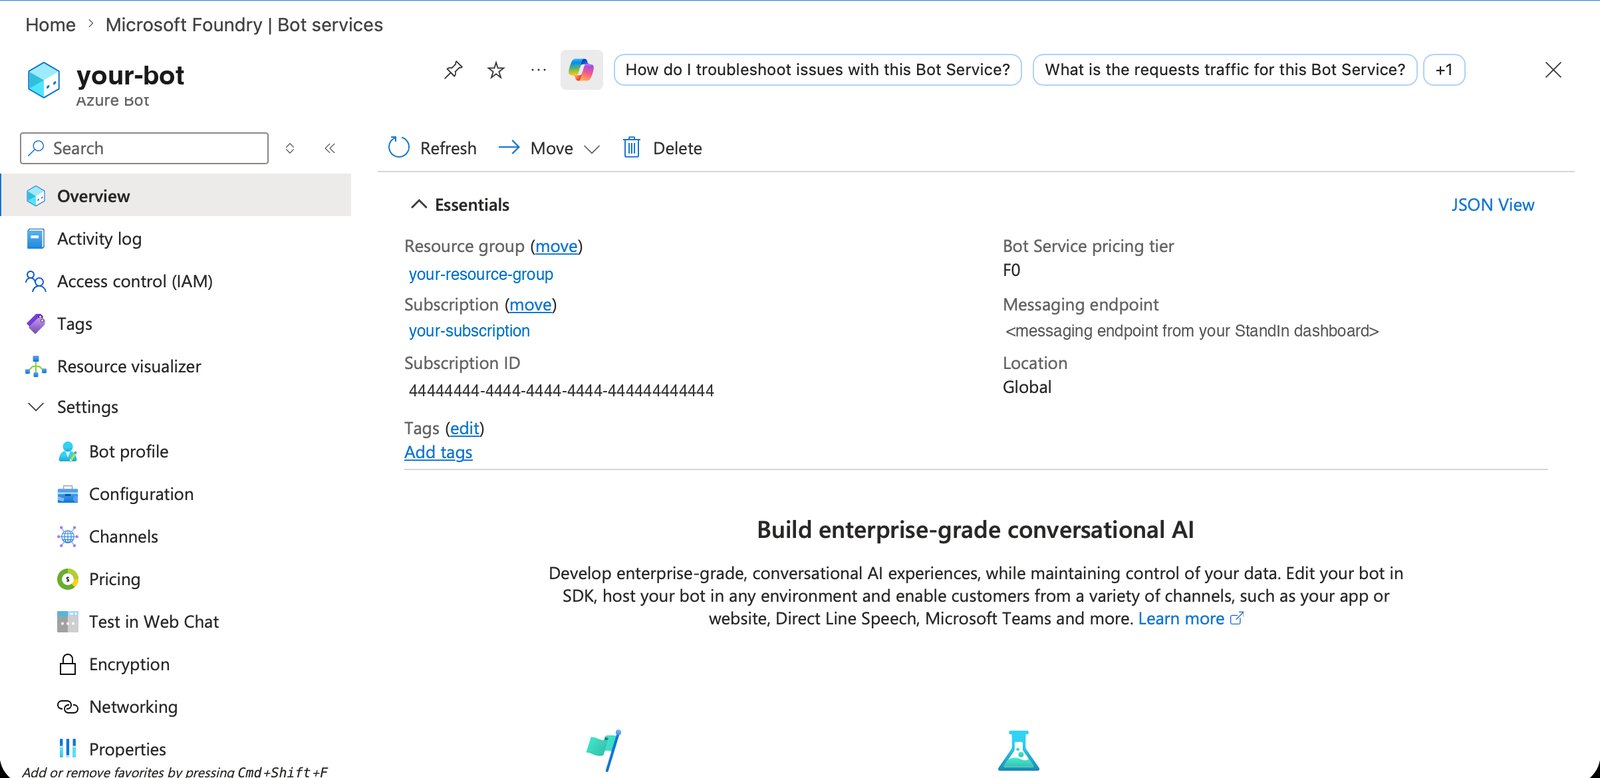
The Azure Bot Overview page after creation.
5. Enable the Microsoft Teams channel
Open the new Azure Bot resource, go to Settings → Channels, and select Microsoft Teams. Accept the terms and apply; the channel appears under connected channels as Healthy.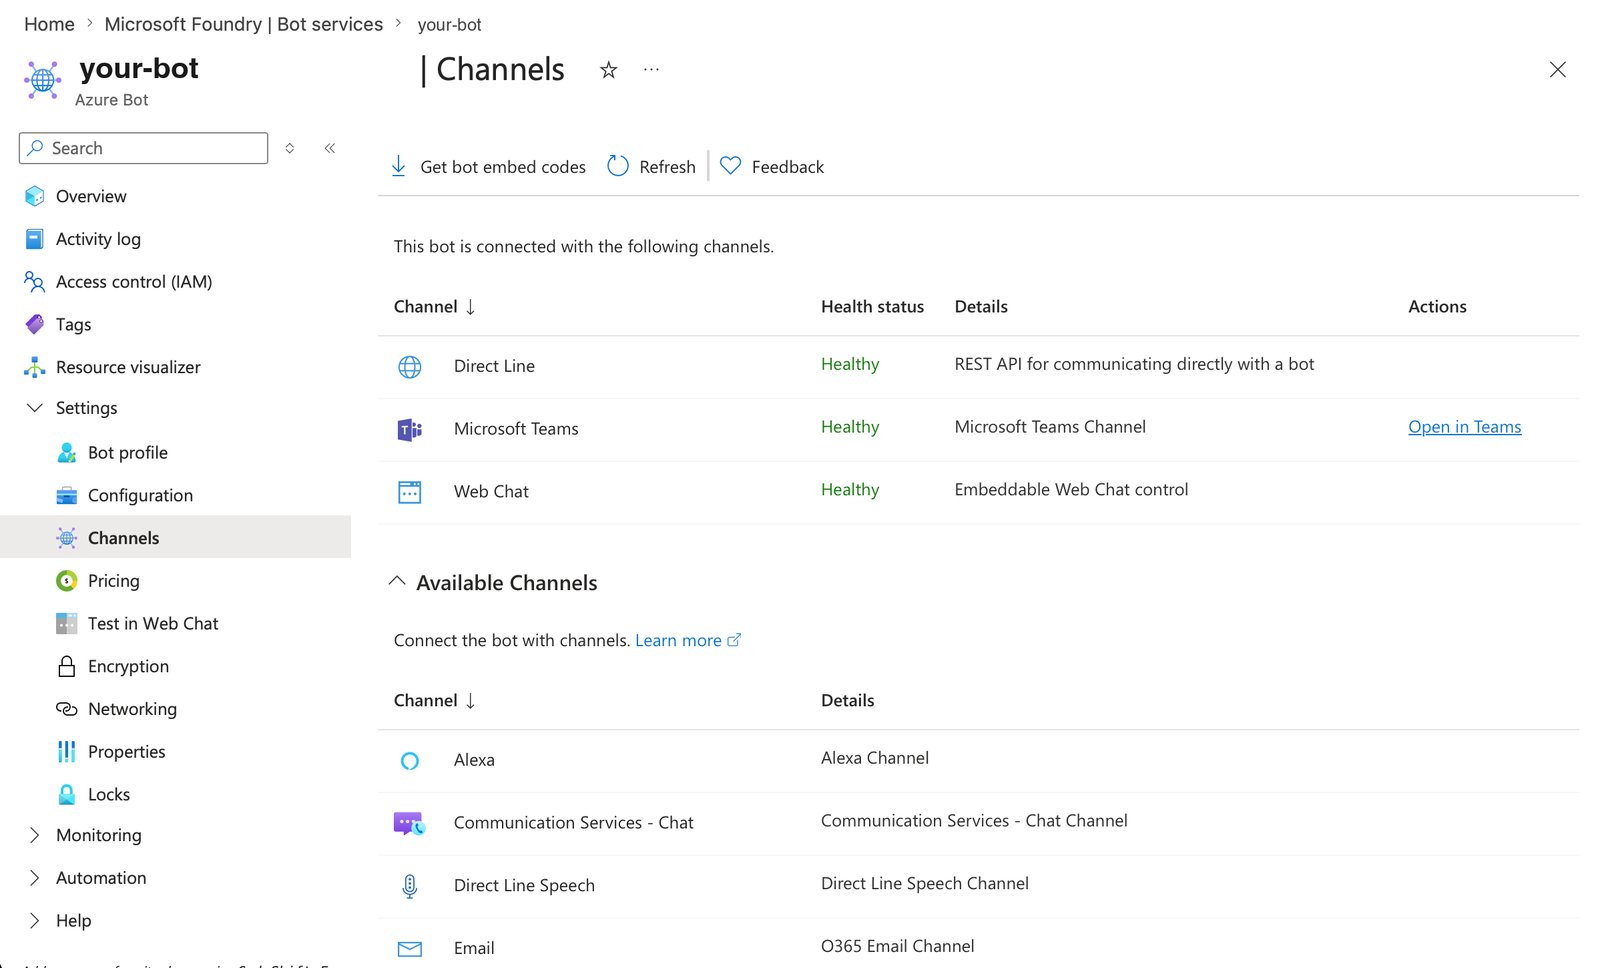
Channels: Microsoft Teams connected and Healthy.
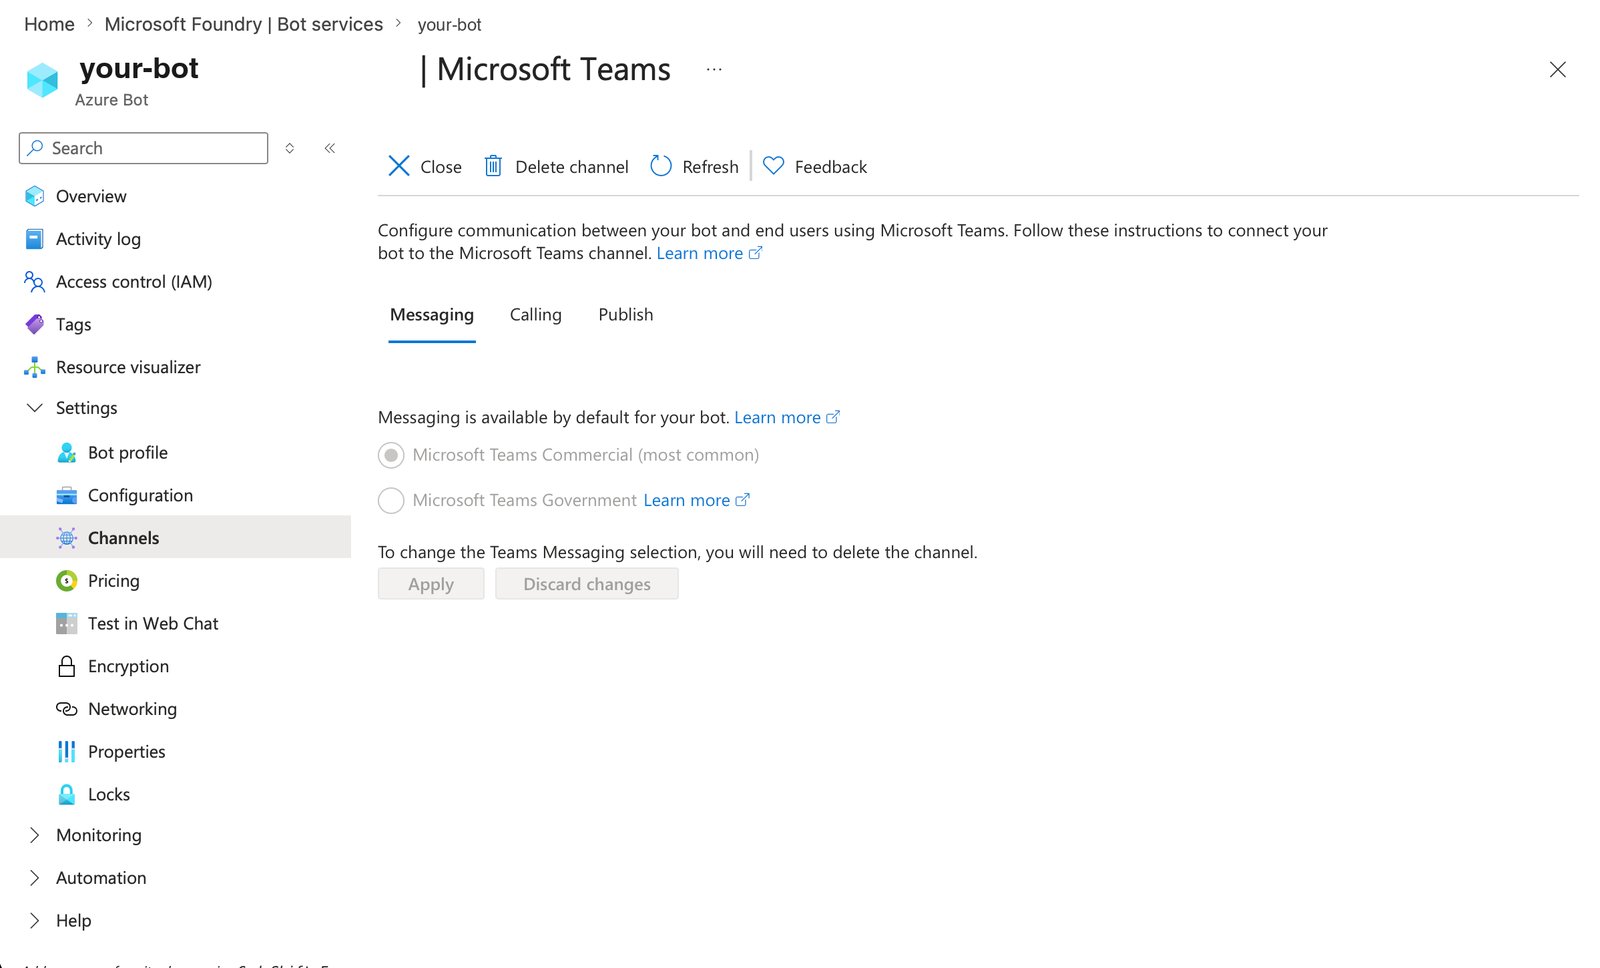
The Teams channel opens on the Messaging tab.
6. Enable calling and set the webhook
Still in the Teams channel, open the Calling tab:- Check Enable calling.
- Set Webhook (for calling) to the calling webhook URL from your StandIn dashboard (shown on your identity after you register it).
- Apply.
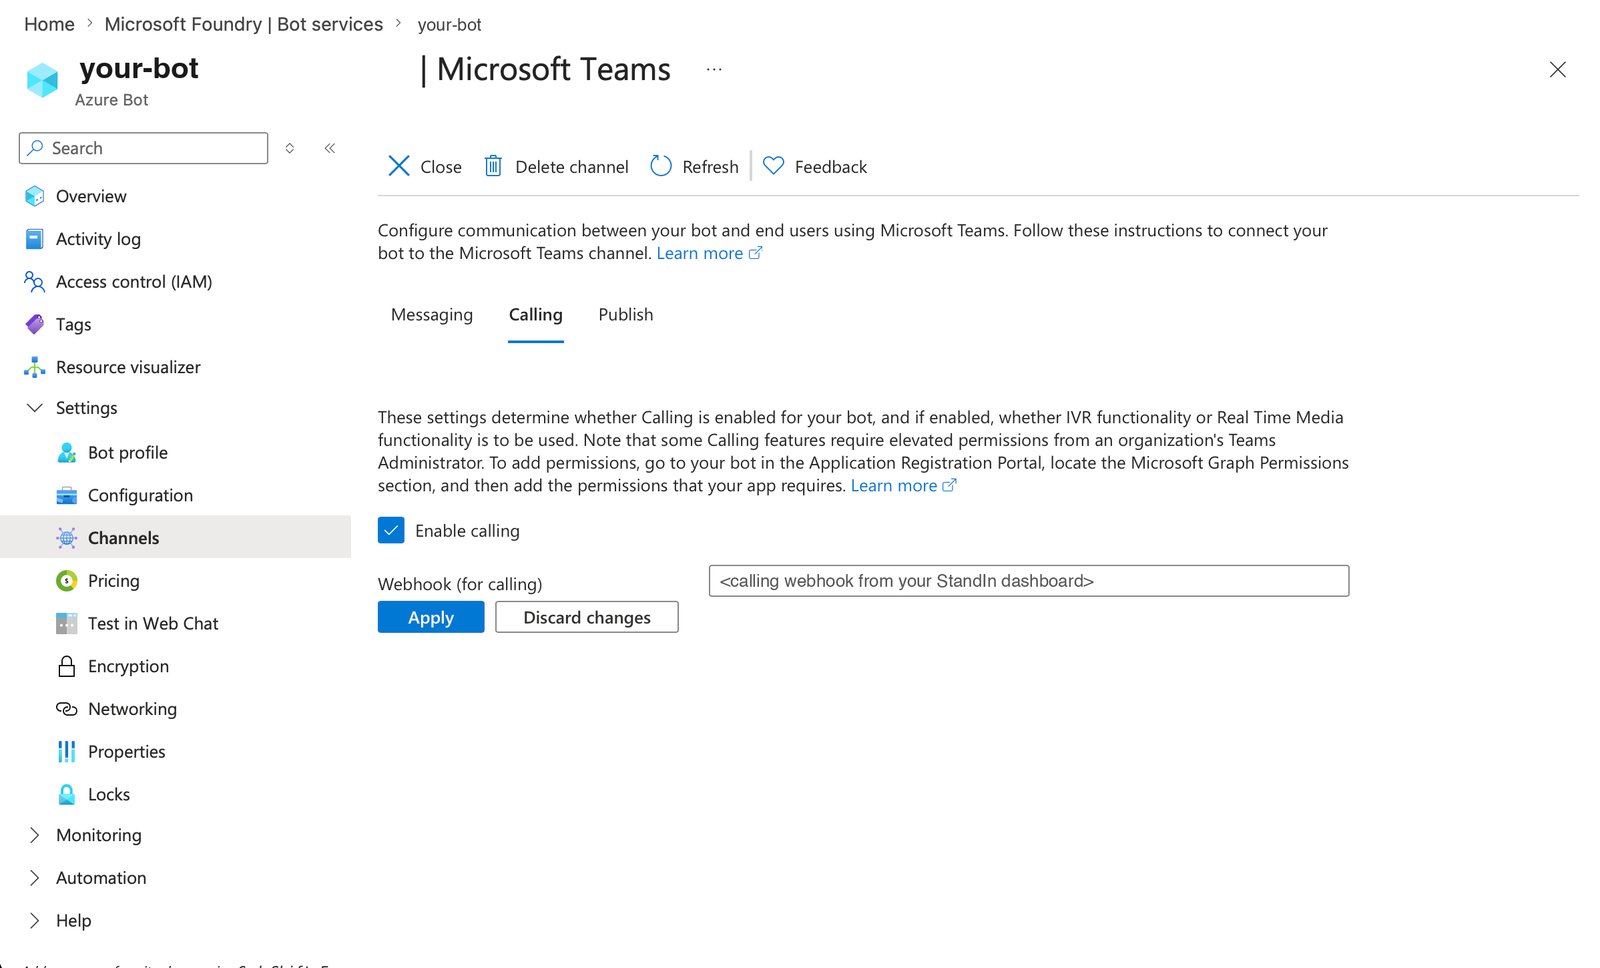
Calling tab: Enable calling, webhook from your StandIn dashboard.
7. Set the messaging endpoint (optional, for chat)
Voice works without this step. If you also want Teams chat, go to Settings → Configuration and set Messaging endpoint to the URL from your StandIn dashboard.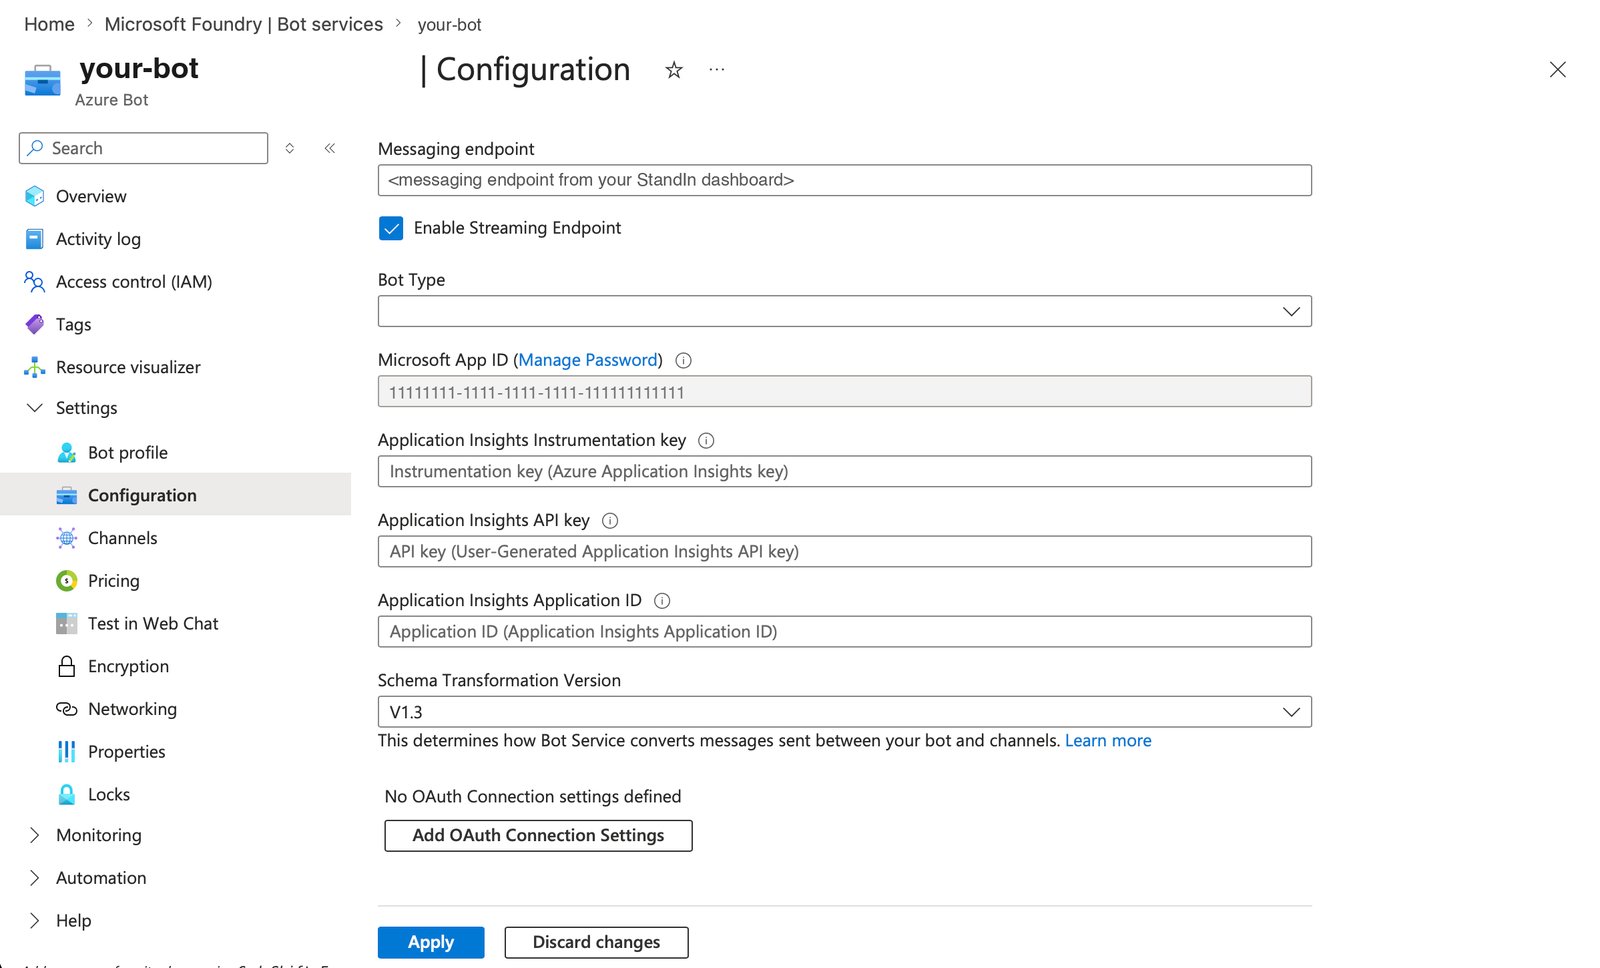
Configuration: the messaging endpoint powers Teams chat.
https:// URL where your agent serves Bot Framework chat messages, e.g.
https://<your-public-host>/api/messages (paste the bare host and StandIn appends /api/messages
for you). Until then, chat messages get a “chat endpoint not configured” reply.On both OpenClaw and Hermes that public /api/messages must reach 127.0.0.1:3978, path
/api/messages - your runtime’s own Teams channel, a different process and port from the voice
plugin, which serves /msteams/calling on 9442 on both runtimes. See
Expose your agent for the two mount commands.8. Grant Graph permissions
Back on the app registration (the same Entra app asbotId): API permissions → Add a
permission → Microsoft Graph → Application permissions, add the list below, then select
Grant admin consent for your tenant (requires an admin).

API permissions > Add a permission > Microsoft Graph.
| Permission | Purpose |
|---|---|
Calls.JoinGroupCall.All | answer / join Teams calls and meetings |
Calls.JoinGroupCallAsGuest.All | join meetings as a guest participant |
Calls.AccessMedia.All | access real-time Teams call audio/video media |
Calls.Initiate.All | outbound 1:1 “call me back” (skip if unused) |
Calls.InitiateGroupCall.All | outbound group “call me back” (skip if unused) |
Chat.Read.All | resolve chat / thread ids and read message context |
ChatMessage.Read.Chat | read messages in chats the bot is installed in |
Sites.ReadWrite.All | upload files / minutes to SharePoint (OneDrive) for chat attachments (optional; not needed on Hermes - its minutes file card rides the Bot Framework attachment contract with bot credentials only) |
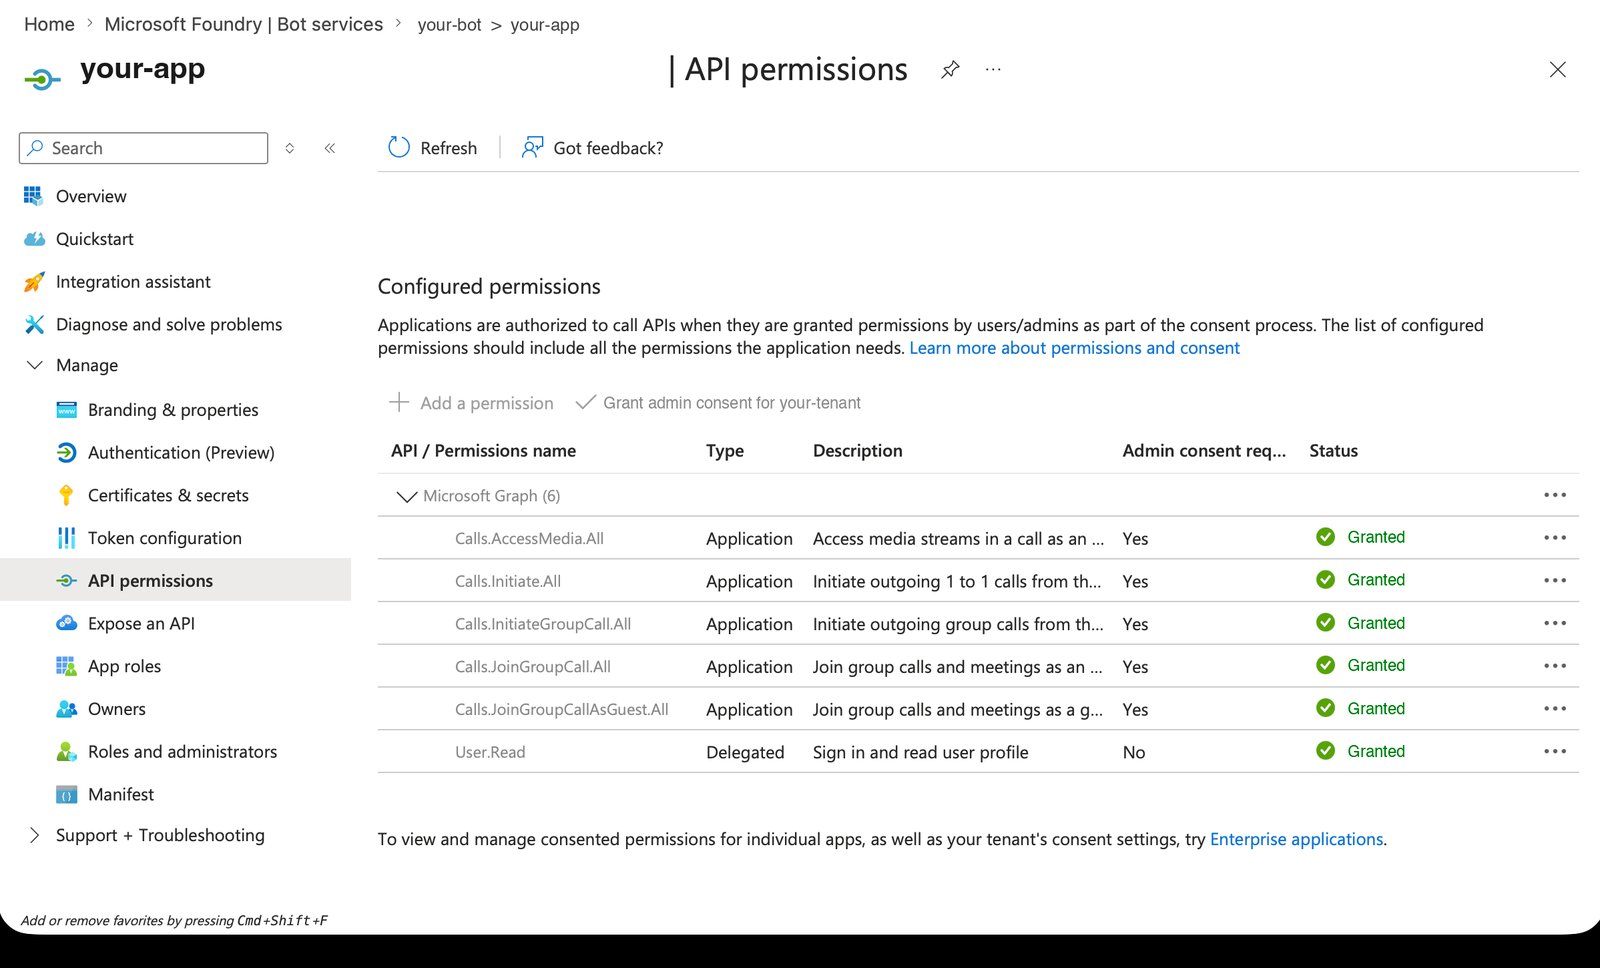
Configured permissions with admin consent granted for the calling permissions.
Calls.* permissions), Grant tenant-wide admin consent,
and the cloud communications API overview.
Checkpoint
You should now have:- Client ID (
botId), tenant ID, and a client secret - An Azure Bot with the Teams channel enabled
- Calling enabled and the webhook pointed at StandIn
- (Optional) Messaging endpoint set for chat
- Graph permissions admin-consented